👩🔬Stellar Laboratory: Stellar at hand for everyone
Whether you’re an experienced engineer, an eager entrepreneur or a learning developer the Stellar Lab will be your best friend when working with Stellar. It is a set of tools that will enable you to work and see the Stellar Network fully functioning without having to write a line of code. If you’re still unsure on which will be your best transactional flow, if you’d like to test different scenarios before taking a definitive route or if simply you’re more of a business mind than a coding one the Lab will allow you to test all you need in the fastest possible way without any implementation needed. Some of the things you will be able to do in it are:
Create accounts with just a couple of clicks in Mainnet, Testnet, and Futurenet using a web UI. For testnet or futurenet it will also allow you to fund your accounts using Friendbot
Build and submit transactions through a UI that will enable you to clearly observe each operation added
Save and Share API Requests to easily build with teammates
Convert your XDR to JSON and vice versa to clearly check what’s in a transaction
Access RPC Methods and Horizon Endpoints to easily query Stellar Network for account, fees or asset prices
Let’s take a look at each one of these
First thing you’ll need to do when working in the lab is making sure you’re using the exact network you intend. Stellar LAb offers you the possibility to work on all of the Stellar Networks but also to connect to your own custom network if you decide to run Stellar on you own using it’s provided image stellar/quickstart
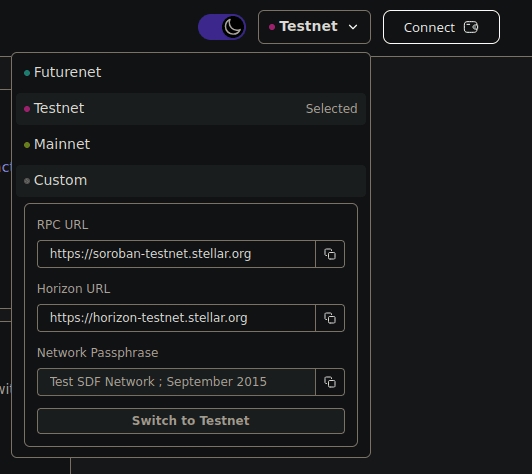
Keep in mind that while you can experiment and try out different things on the lab you can also interact with the ¨real* mainnet, and actually perform real money operations using your stellar account
Once you are in your desired network the first thing you’ll probably want to do is to create a keypair account. The tab Account will be the right place to it:
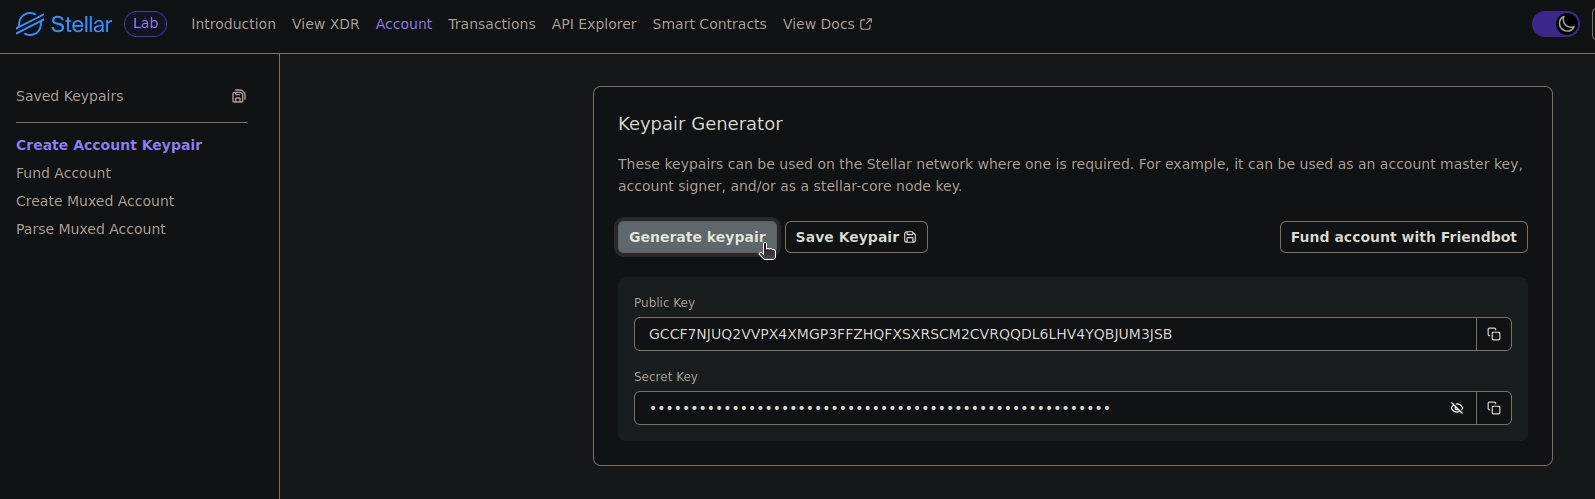
In the option Create Account Keypair Stellar will provide you with a brand new set of keys. Now, keep in mind that only Keypair does not make a Stellar account, so you’ll need to fund them to actually be able to use them.
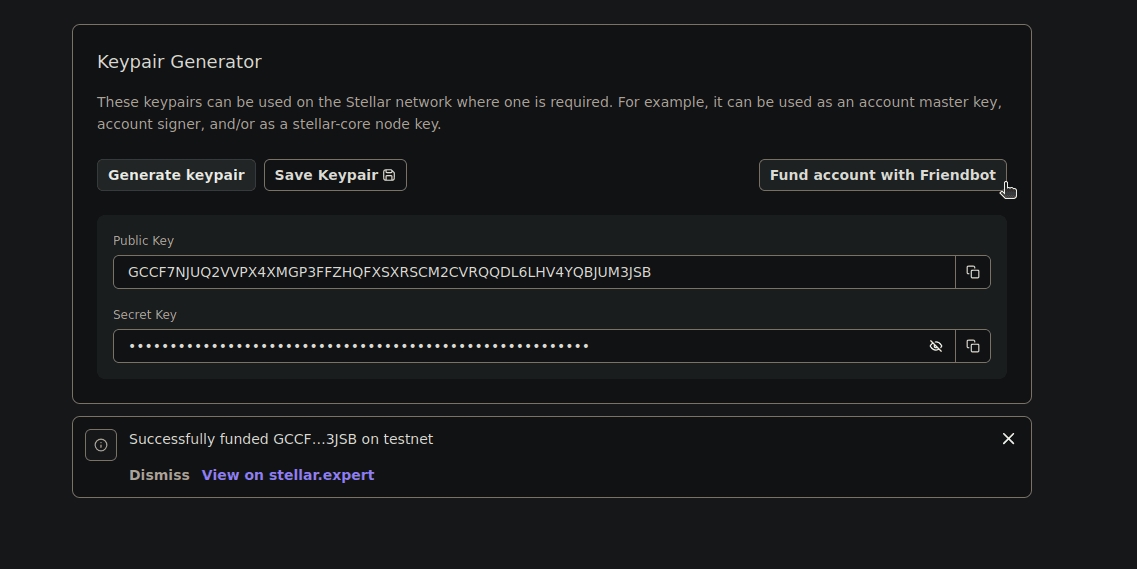
If you’re in production mode and are using the mainnet you can simply take this keypair and fund them with your preferred method. If you’ll be using it for testing you can simply fund them using Stellar’s friendbot. Simply use the ‘Fund account with Friendbot’ button at the top right, wait a couple of seconds and you’ll have a brand new funded account with 10,000 XLM ready to use.
Now that you have an account you’ll probably want to start performing some operations. The Transaction tab will be the right place to it
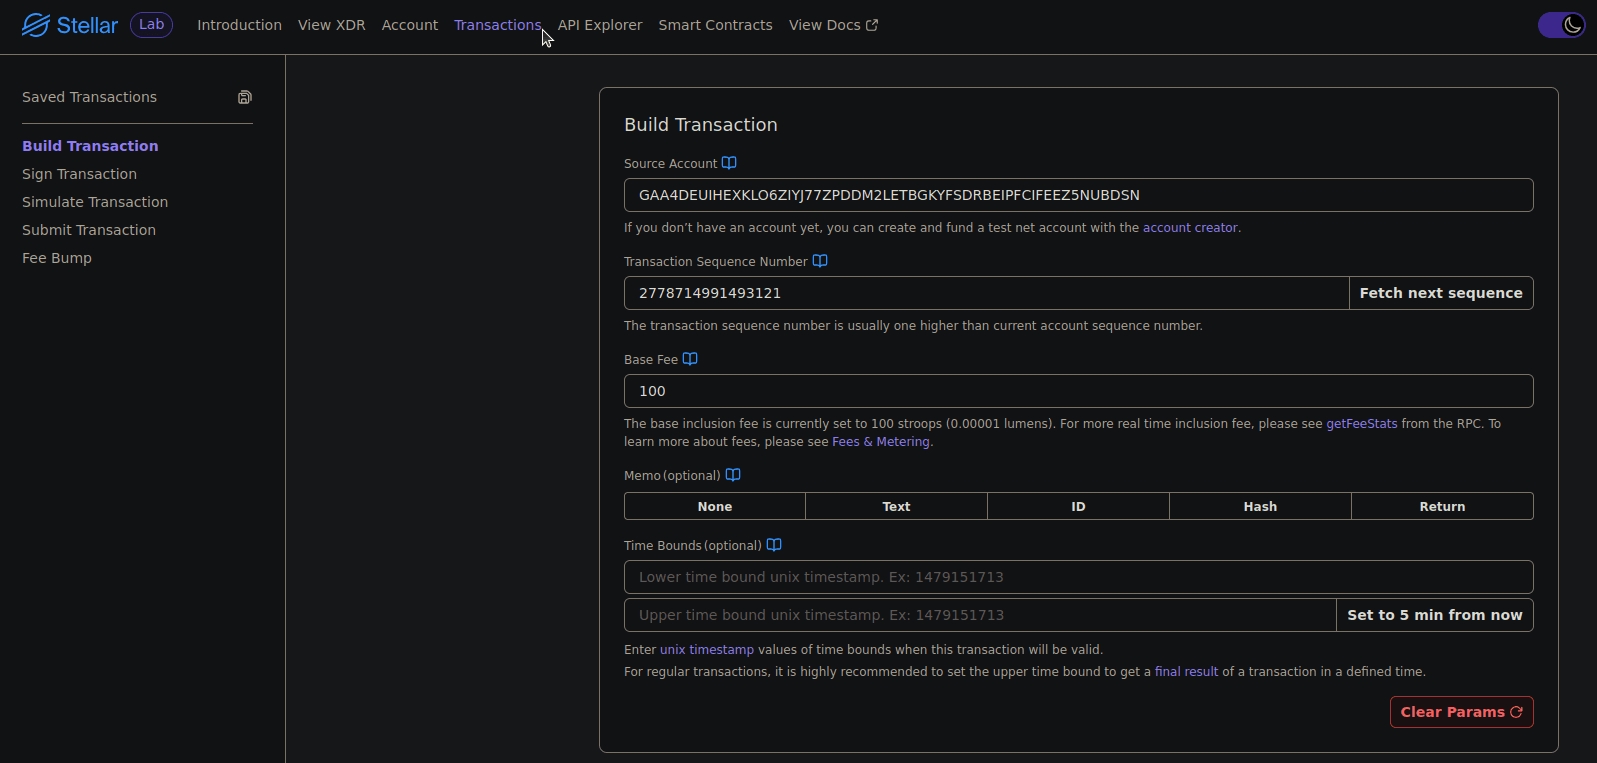
Once you’re in the Transactions section the first thing you’ll want to do is build your transaction. Start by adding the public key you created before in the Source Account section.
Then, use Fetch next sequence to provide a valid sequence number to validate your transaction. In this first section you can set other details like a Base Fee, a Memo or a Time Bound, however these are not necessary for a standard transaction. Once this first step is done move on to add your operations in the next section.
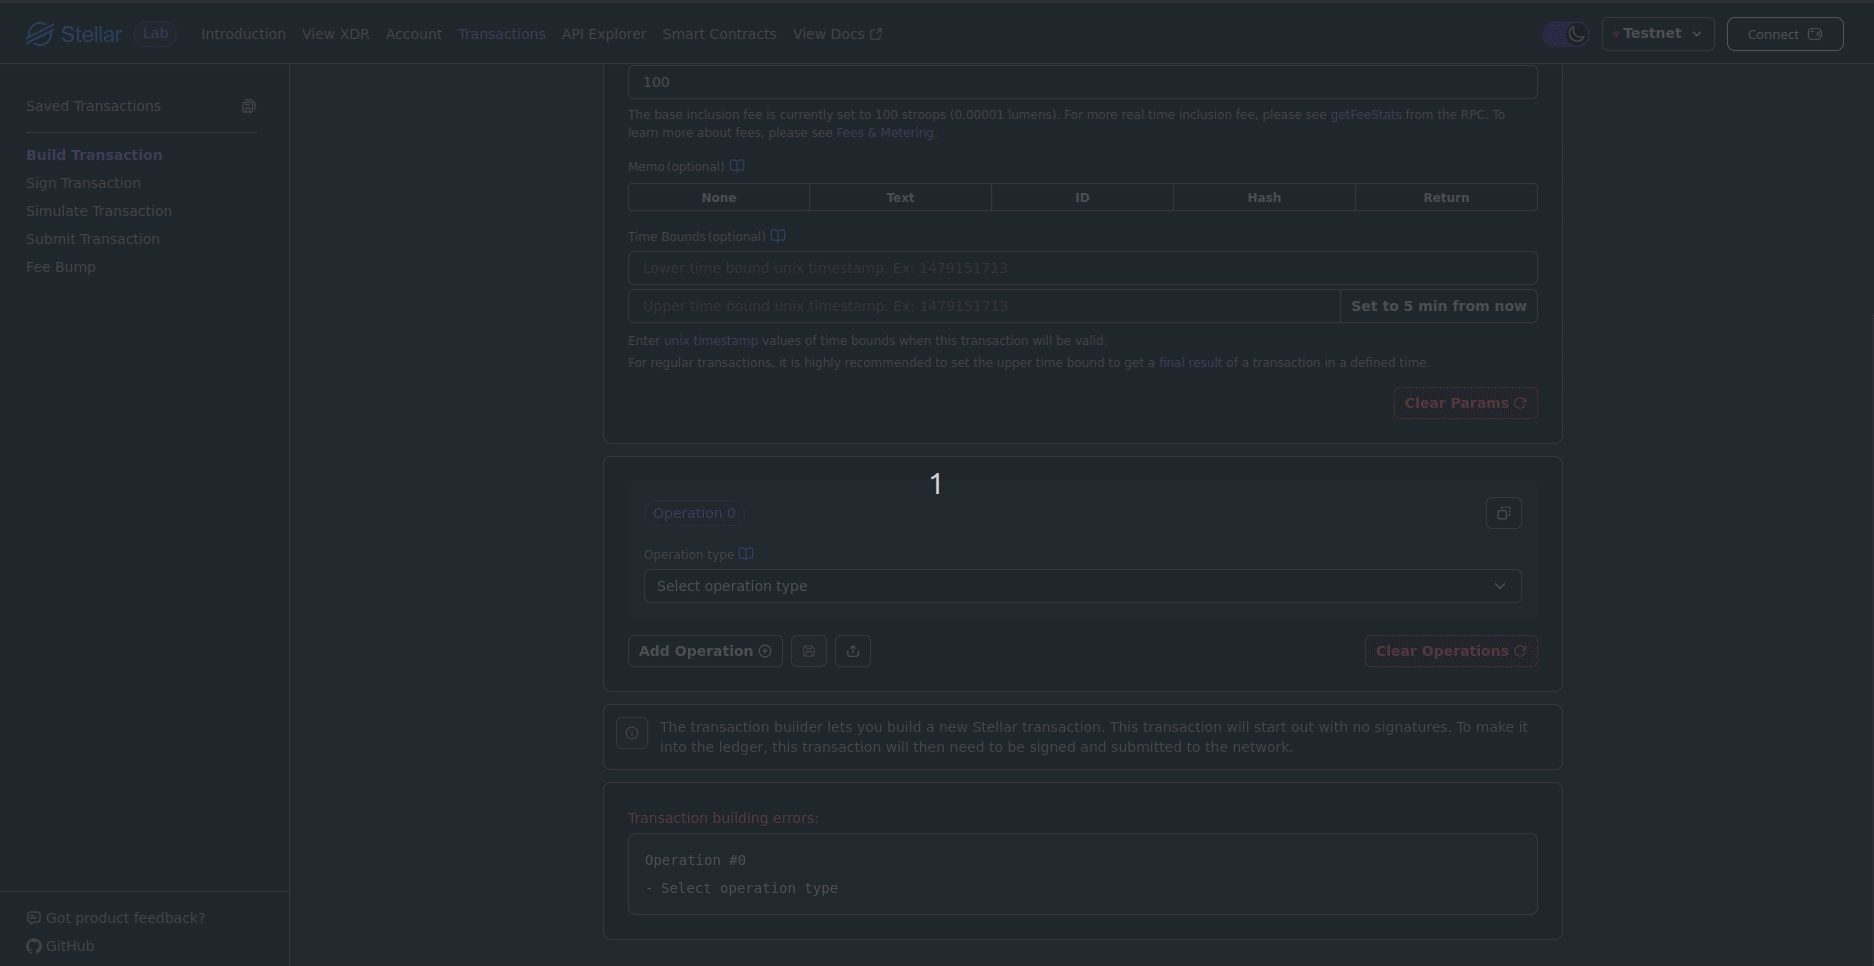
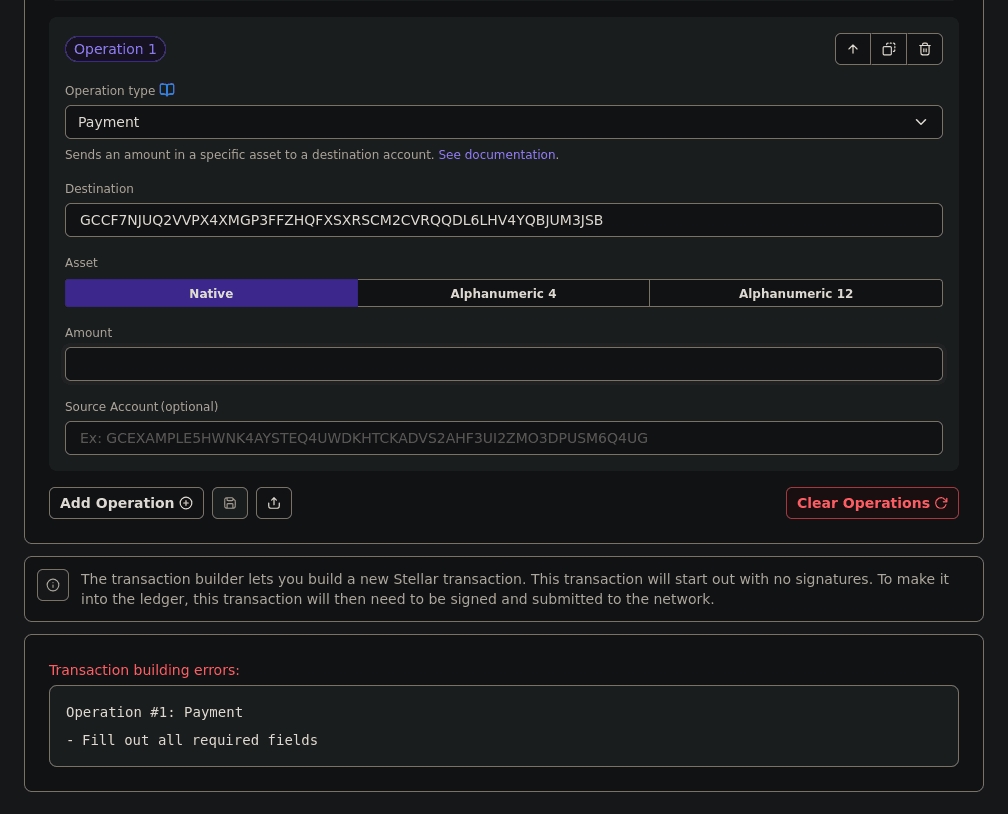
Using the Add operation button at the left button of this section you’ll be able to add as many operations as you like. Each selection will display the required files for each operation and a little description below every field.
If you go a little lower you’ll also see that the Lab automatically warns you if there’s any missing field or if your operations are ready to go, but performing the transaction build automatically
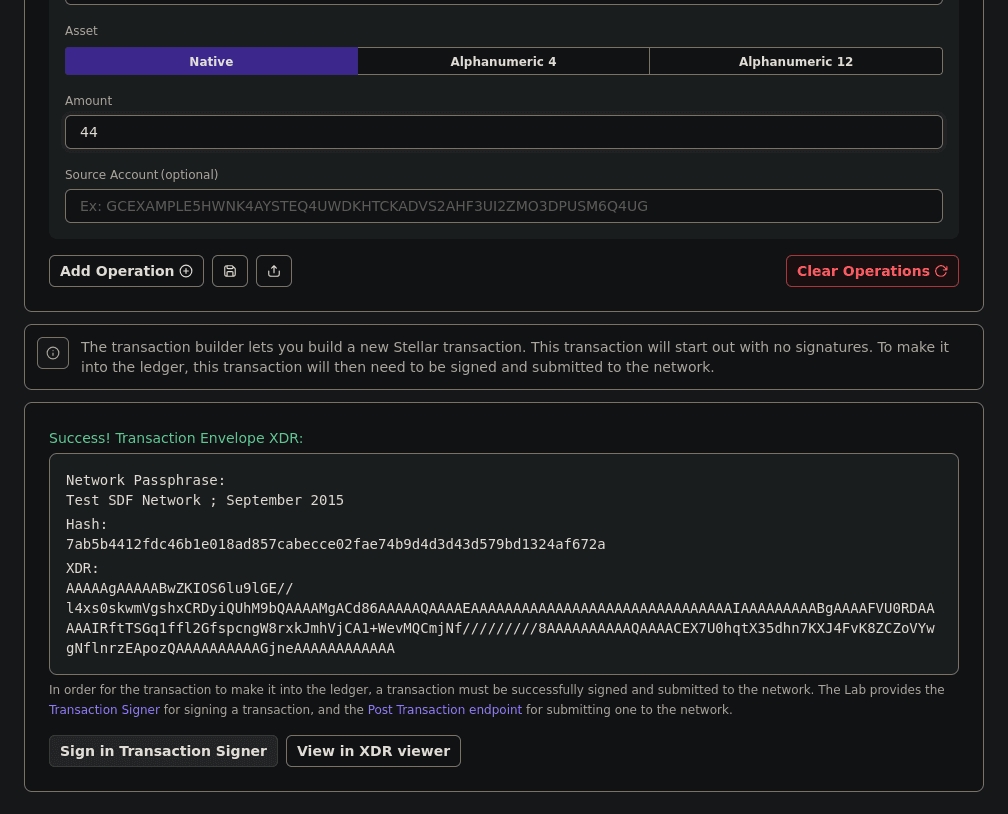
Once everything is set with your transaction you’ll be ready to move over the authorization of your transaction by using the Sign in Transaction Signer
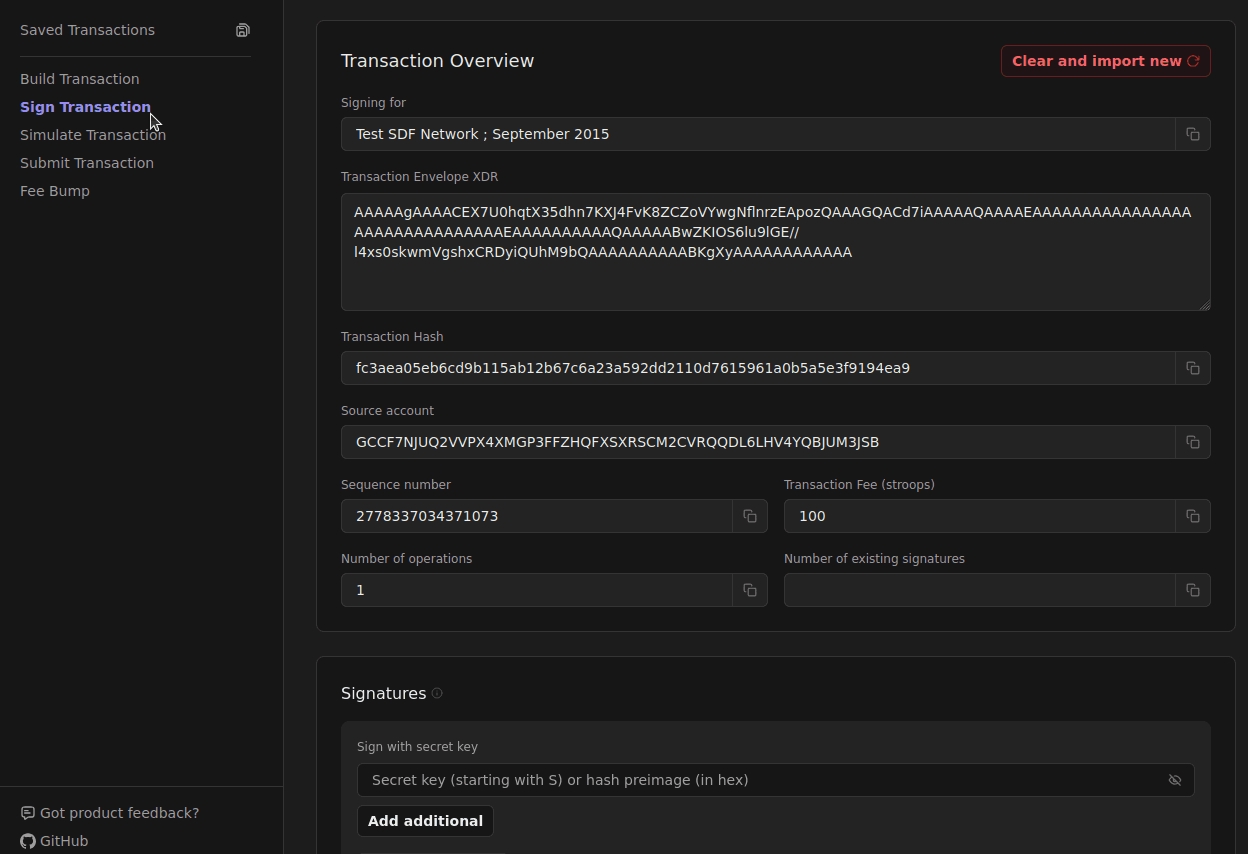
If you’ve been building your whole flow in the Lab it will automatically fill the XDR for your transaction. However, if instead you want to use the lab to securely sign an external transaction of which you have the XDR already you can do that too.
Simply use the Clear and import new button and paste your XDR. In the fields above you’ll be able to check the transaction hash, the Source account, its Sequence number and its fee.
In the following section you’ll be able to add your signature, sign with a hardware wallet or use your preferred extension wallet and add as many signatures as your transaction requires
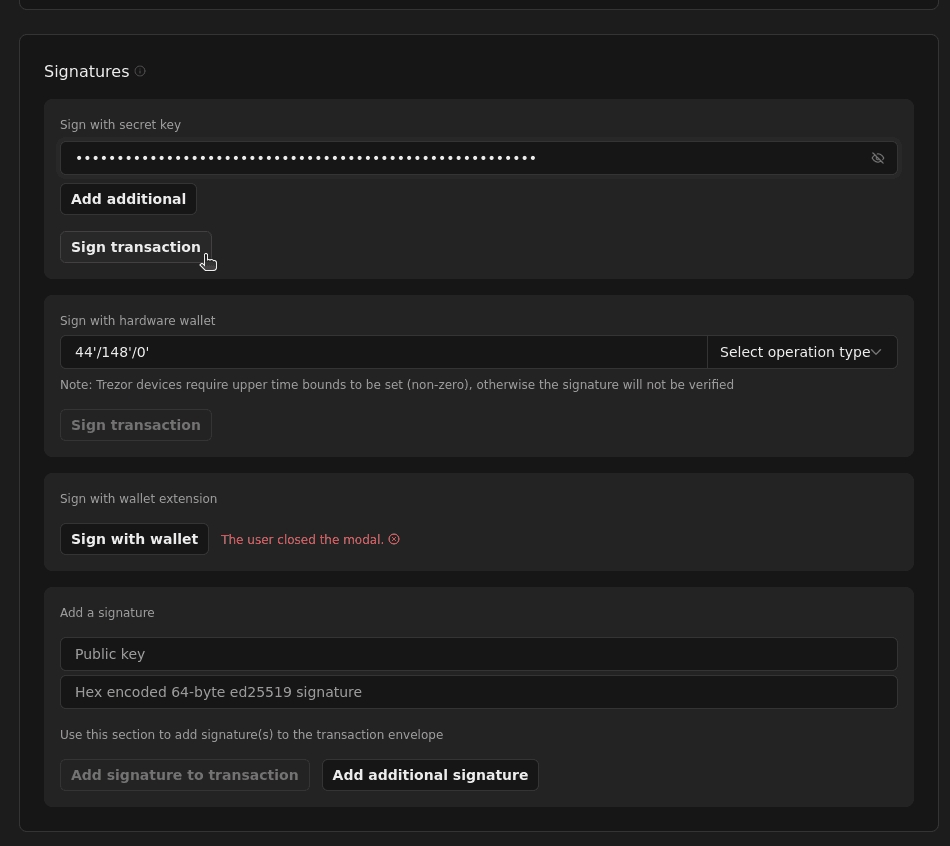
Don’t forget to use the Sign transaction button to actually sign your transaction, which will generate a new XDR for a signed transaction at the bottom of this section
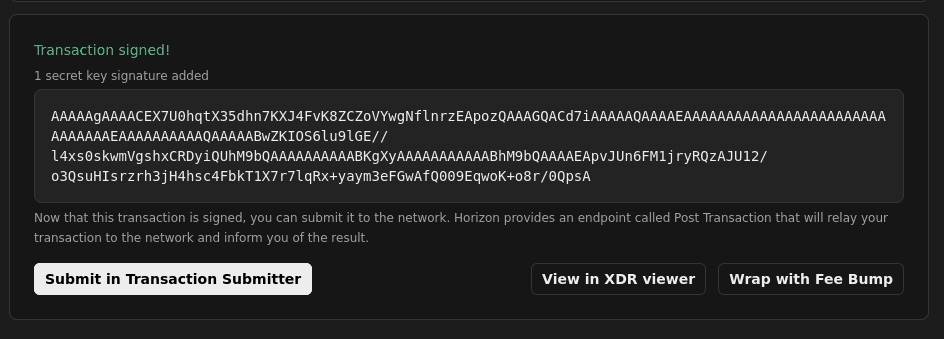
Now that all requirements are set for your transaction you can choose to directly submit your transaction or check your XDR before submitting it
In case you’re sure of each operation in your transaction you can directly move to the Submit transaction section.
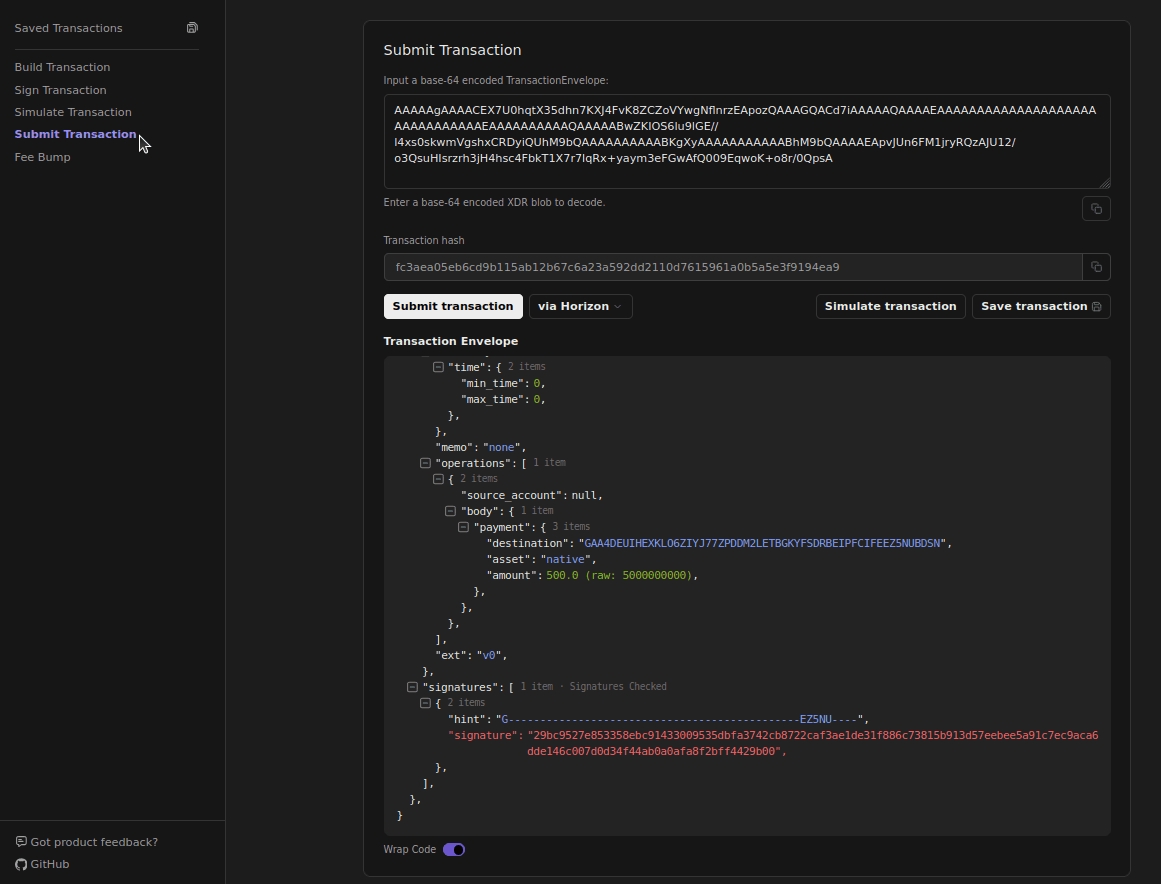
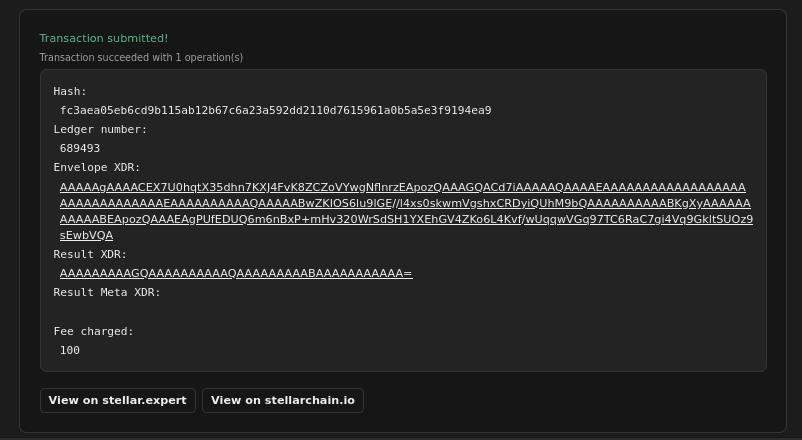
The lab will provide you with a detailed view of your transaction and once you use the Submit Transaction it will submit it to Stellar Network via Horizon or RPC and you’ll see its result just as if you were using code to submit it in your app.
If everything went fine in a couple seconds you’ll see your transaction result with a Transaction submitted! Alert and its Hash, Ledger number, Envelope XDR, Result XDR and Fee charged
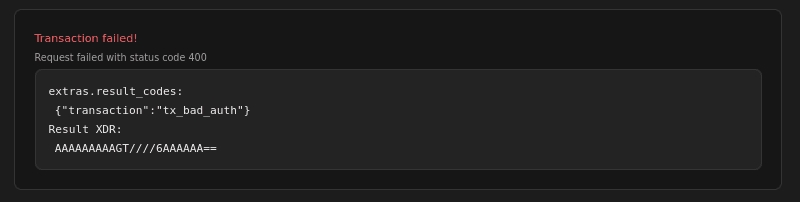
If, however there’s some bad config, authorization or unfunded operation it will provide you with a guidance error
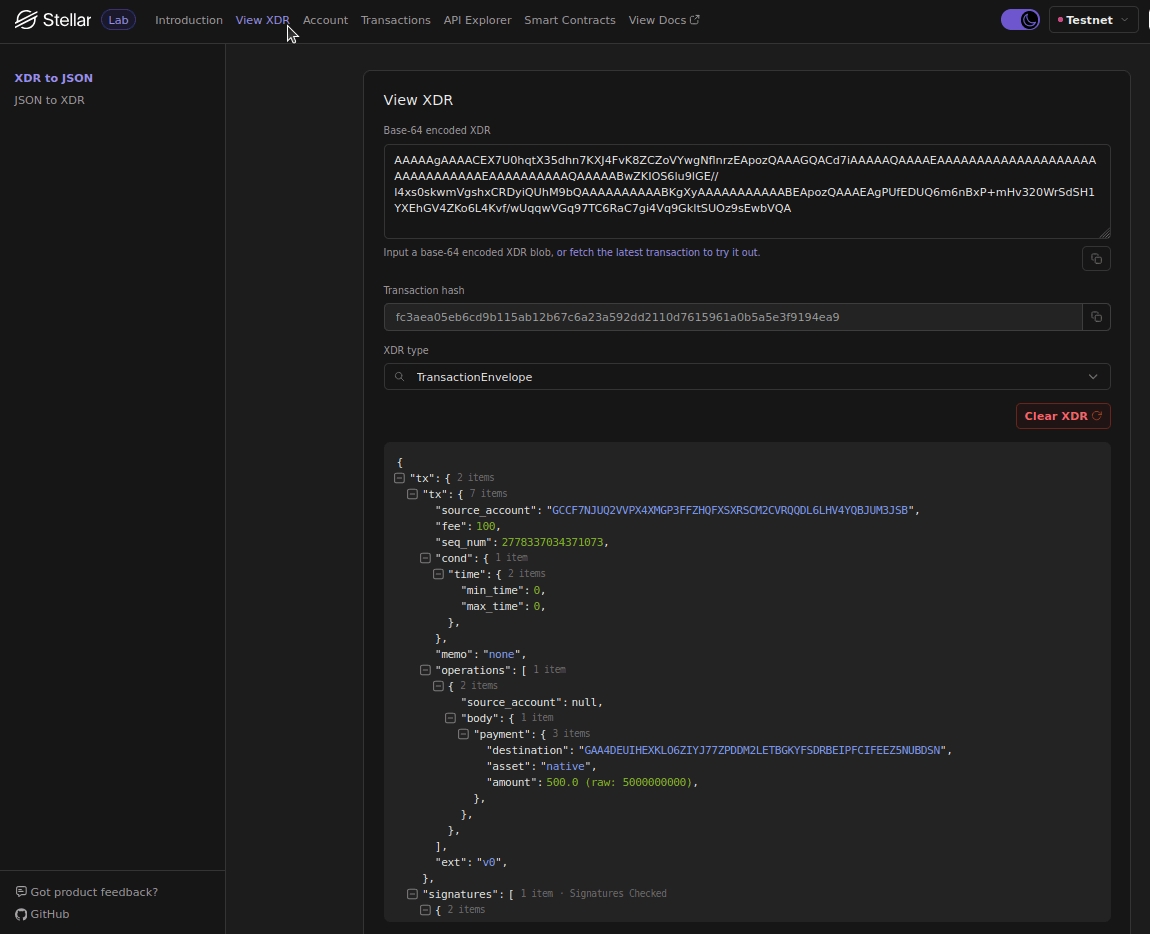
It’ll provide you with a whole detail of what you’re signing, which operations are included, source account and signatures related. Keep in mind that if you’re seeing an ‘Unable to decode input as TransactionResult: xdr value invalid. Select another XDR type.’ it’s probably due the XDR type selected, so make sure you’re using the right one.

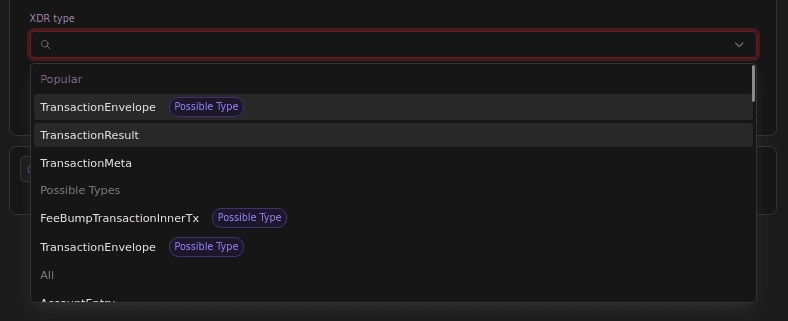
You can also check an XDR for a single operation once you’ve built it, to make sure each value is correct. Do this by copying the XDR and selecting the operation type. The last resource the Stellar Lab will provide for you is accessing various endpoints from the RPC and Horizon through the API Explorer
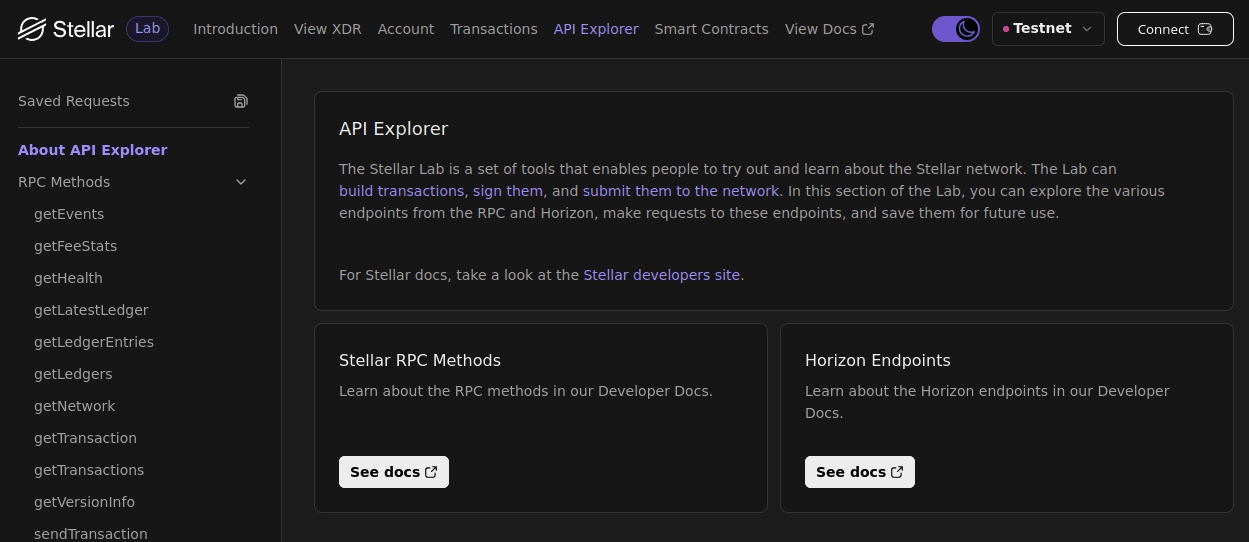
Many of the consults you’ll wanna make while working on Stellar will be available in this section, from account balances to trade offers or fee stats and it will also allow you to perform some actions, such as sending or simulating a transaction . Each one of the endpoints listed will provide you with clear fields to perform your desired query, and once you fill the form you will also se on the top the exact request to Stellar Network to fetch your results.
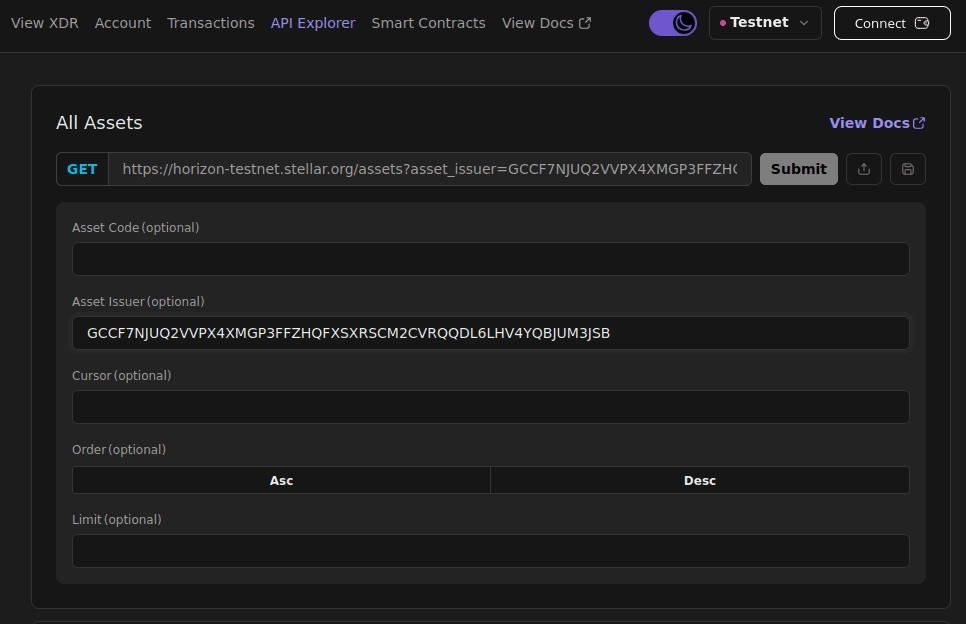
Once you’re developing the best approach will probably to relay on Stellar SDK, but if you need to check something for yourself or make a raw query to Stellar Server the API Explorer will provide you with the exact request to make from anywhere.
Conclusion
We’ve made a thorough journey through Stellar Lab functionality. It simplifies the process of creating accounts, building and testing transactions, exploring API endpoints, and managing operations, all without requiring extensive coding knowledge. Whether you're experimenting on Testnet or performing real transactions on Mainnet, Stellar Lab equips you with the tools to navigate the Stellar ecosystem efficiently and confidently.
Last updated